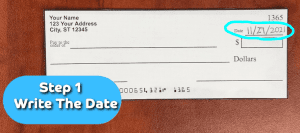
Step 1: Write The Date
In the top right hand corner of the check, write the date. You can write out the month completely or use numbers. Ex: Both November 29th, 2021 and 11/29/2021 are acceptable.
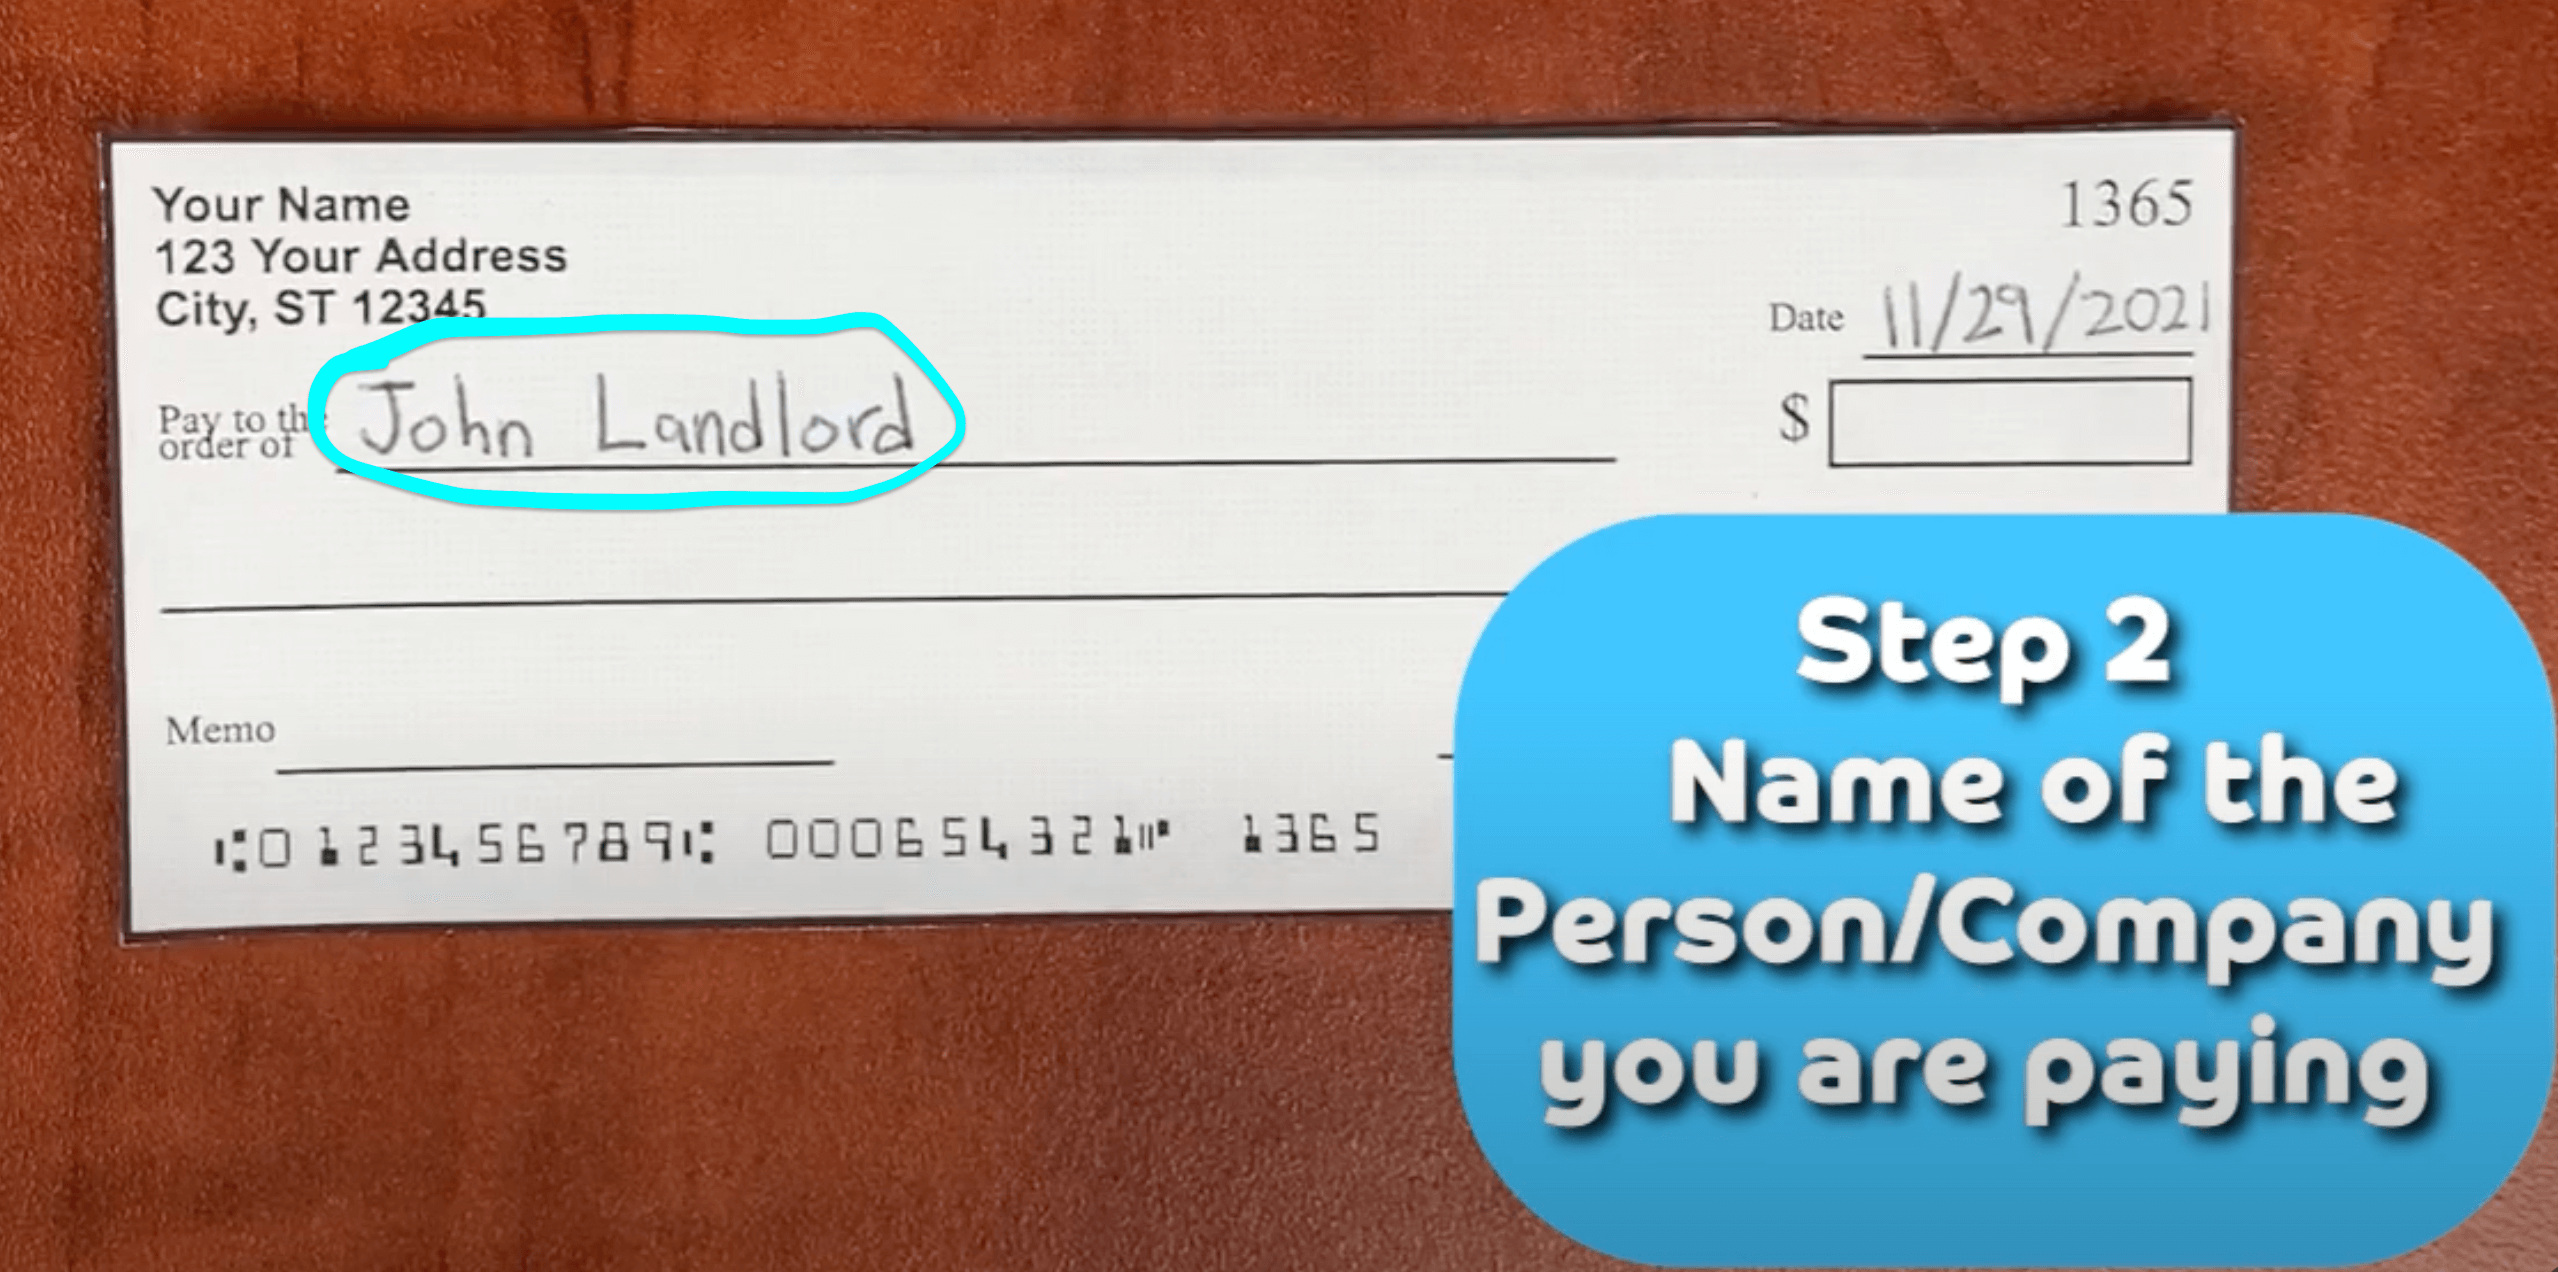
Step 2: Write the Payee
Payee is the recipient of the check. Write their name on the line “Pay to the order of.” This can be a person or organization name, but make sure not to use any nicknames.
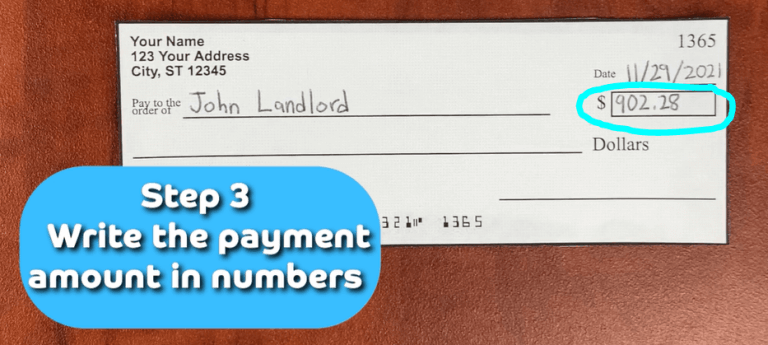
Step 3: Write Payment Amount in Numbers
Write out in numbers the amount of money you will be paying. To be safe, start to write all the way to the left of the box to ensure the number can’t be changed to another value.
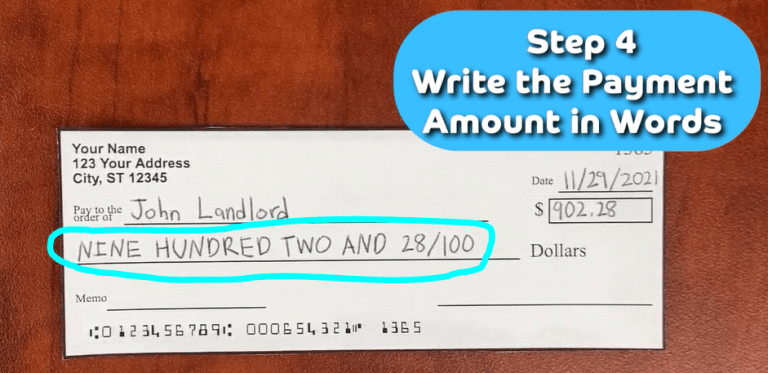
Step 4: Write Payment Amount in Words
Under the “Pay to the order of” line, write out the same amount you wrote in numbers, in words. Note if there are cents included, end the amount with the cents/100. Don’t know how to convert the number to words? Use this link to automatically convert your number value to words.
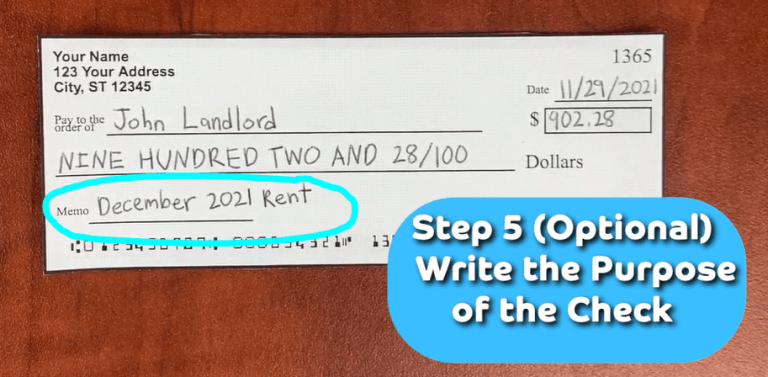
Step 5: Write the Memo (optional)
The memo describes what the check is for. This step is optional, but good to have so you and the recipient knows the purpose of the check.
Step 6: Sign the Check
In the bottom right-hand corner, include your signature on the check. This is a very important step to ensure your check won’t be rejected.

Anatomy of a Check
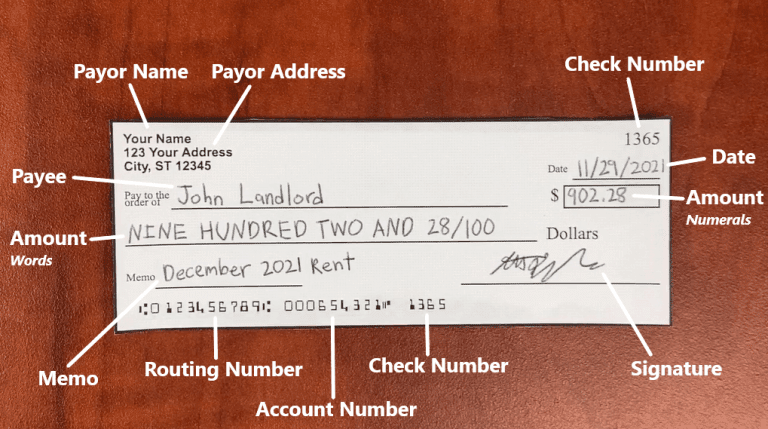
Definitions
Payor Name: The person/entity who will be paying for the check.
2. Payor Address: Address of the person/entity who will be paying for the check.
3. Check Number: Identifies the specific check being used for tracking and record-keeping.
4. Date: Date you are writing the check. Can also put a date in the future if you don’t want the check to be cashed before then.
5. Amount (Numerals): Amount being paid in numerical form.
6. Signature: Signature of the person writing the check. This step authorizes the check. If no signature, the check is invalid.
7. Account Number: Identifies the specific account the money will be taken from.
8. Routing Number: Identifies the financial institution the money will be taken from.
9. Memo: This is optional. Used to describe the purpose of the check.
10. Amount (Words): Amount being paid, written out in words.
11. Payee: Name of the person or organization receiving the money.
Want More? Some Quik Tips.
No you must always use a pen. Writing a check in pencil opens the risk of the check being altered easily.
If you make a mistake, simply draw a single line through the error and rewrite it, putting your initials next to the change. If you’d rather not use the check at all anymore after the mistake, invalidate the check by writing “VOID” across the whole check and tear it in half.
This is called postdating the check. You can do this by simply dating the check to that future date you’d like. Note though, that banks don’t necessarily have to honor this post date and could still cash the check before the date anyway.
This would result in overdraft fees or a bounced check. In either case, this would result in you paying fee money so it’s best to verify you have enough money in your account before handing over a check.
Rehash
- Write the Date
In the top right corner of the check, write the date.
- Write the Payee
On the “Pay to the Order of” line, write the name of the person or company receiving the check.
- Write Payment Amount in Numbers
In the box to the right of the payee line, write the payment amount in numbers.
- Write Payment Amount in Words
Below the payee line, write out the amount in words.
- Write the Memo
Optional step, on the bottom left line you can write a short note about the reason for the check.
- Sign the Check
In the bottom right hand corner, sign your name exactly as it appears on your bank account.