Oh no! You’re driving, listening to your favorite song, then all of a sudden you hear a pop, followed by some flapping noise shortly after. You see your tire pressure light come on so you pull over to a safe location and go to investigate. To your dismay you see a big ol’ nail in your tire.
You may be tempted to just drive back home, thinking the screech of the rim on the road isn’t that annoying, but driving on a flat tire can cause damage to the wheel, tire and even the suspension of the vehicle. Not to mention the handling of the vehicle would be compromised and put you in a more dangerous situation on the road!
Knowing how to change a tire is one of those adulting skills we never got taught in school. But it’s an important skill that can keep you safe and prepared in the event of a flat tire. In this guide, we’ll give you the step-by-step of how to change that tire.
Step 1: Pull over to a safe location
Once you suspect you have a flat tire, the first and most important step is to pull over to a safe location. Think a gas station or parking lot, or if on the highway a safe shoulder area if you must. Make sure to turn on your hazard lights if on the shoulder of the road and turn off your car.
IMPORTANT: Apply the emergency break at this step. If you end up needing to change the tire, this is a must safety precaution!
Step 2: Assess the damage
Look at the tire in question. If you see that flat tire then you know you have to change it.
Step 3: Gather the necessary tools
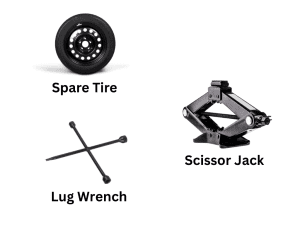
The necessary tools should be in the trunk of your car. They are…
- The spare tire (duh)
- A jack
- A lug wrench
IMPORTANT: You’ve applied the emergency brake, but for extra protection use a sturdy rock, brick, or wheel chock behind one of the tires. If you’re changing a front tire, block a rear tire. If you’re changing a rear tire, block a front tire. This extra precaution can protect you if the parking brake fails or slips.
Step 4: Loosen the bolts
Next step is to loosen the bolts with the lug wrench. Remember, lefty-loosey so turn counterclockwise. Typically the bolts are in there tight, so you’re going to have to really use your muscles (or foot) for this. We’re only going to loosen for now, we’ll fully take them out later once we jack up the car.
Step 5: Jack up the car
Locate the jack point using your owner’s manual. If unsure, it is usually the flat metal part behind the body of the car, near the wheel you’re changing. Jack up the car by rotating right and only do so enough to where you can take the tire out easily.
IMPORTANT: Never place your body underneath the car. It’s unlikely, but you never know if the jack could fail.
Step 6: Take out the bad tire
Now, fully take out the lug nuts. Be sure to keep them stored where you can access them later when we put the spare tire on!
After the lug nuts are out, you can easily take out the tire. It’s best to place this tire in your trunk, where your spare tire was located, although it won’t fit perfectly since this regular tire is bigger than the spare.
Step 7: Place the spare tire
Like how the old tire was positioned on the car, place the spare tire the same way. The wheels studs should slide into the lug holes on the spare tire perfectly.
Once the spare tire is in the wheel hubs, tighten the lug nuts to hold the tire in place. ONLY tighten them with your hand. Once we lower the jack we’ll tighten with the lug wrench, when the car is more stable on the ground.
Step 8: Lower the jack
Now you can simply lower the jack by turning the handle left.
Step 9: Tighten the lug nuts
Last step, fully tighten the lug nuts so the wheel is attached well to the car. Note you want to tighten in a specific order using the star method shown below. This provides a safer and more secure fit, provides even pressure distribution and prevents warping of the wheel.

Put the car jack and lug wrench back in the trunk and you’re good to go. Note that the spare tire isn’t meant to be a permanent solution. You’ll need to get a fresh, new tire to replace the spare.
Rehash
Learn how to safely change a flat tire with these simple steps, from loosening the bolts to using the jack.
- Pull Over To A Safe Location
Find a safe area away from traffic to stop your car. Then, turn on your hazard lights and apply the emergency brake.
- Assess the Damage
Check which tire is flat or damaged by pressing on it or lookin for puncture holes.
- Gather the Necessary Tools
Collect the tools you need which include your spare tire, car jack and lug wrench.
- Loosen the Bolts
Using the lug wrench, loosen the lugs nuts on the flat tire by turning counterclockwise. Note to only loosen them not fully remove them!
- Jack Up the Car
Place the jack at the manufacturer recommended jack point near the flat tire and raise the vehicle until the flat tire is a few inches off the ground. For your safety NEVER put any part of your body under the car while it’s on the jack.
- Take Out the Bad Tire
Now, fully remove the loosened lug nuts and take off the damaged tire.
- Place the Spare Tire
Align the spare tire with the wheel bolts and slide it onto the hub. Only hand tighten the lug nuts to hold the spare tire in place.
- Lower the Jack
With the jack, lower the car back to the ground.
- Tighten the Lug Nuts
After the car is fully on the ground, tighten the lug nuts in a crisscross pattern, ensuring the tire is secured onto the wheel hub safely.
Article FAQ
The spare tire is speed and distance limited: usually a distance of 50 miles and speed of 70 mph. This means it’s important to change the spare tire for a permanent one as soon as you can.
No, never trust the jack completely. When the car is lifted never put any part of your body under the car, as jacks can fail.
Remember the rule: Right-tighty, left-loosey. Turn left (counterclockwise) to loosen the lug nuts and right (clockwise) to tighten them.
This isn’t recommended as driving on a flat tire can damage your wheel and suspension. If possible, change the tire first before you continue driving on it.
Yes you must. It’s easier and safer to loosen lug nuts while the car is on the ground because you have more leverage and because the wheels won’t spin.